
10 Money Flowers Diy Dollar Bills Ideas

10 Money Flowers DIY Dollar Bills Ideas
Introduction
Crafting origami-style flowers from real dollar bills transforms traditional cash gifts into sculpted, memorable keepsakes for graduations, weddings, birthdays, and retirements. Money origami combines paper-folding fundamentals, delicate floral wire bracing, and creative bouquet assembly without damaging or tearing authentic currency. This comprehensive guide details ten distinct money flower design ideas, focusing on crisp creasing techniques, bill preservation, structural stem mounting, and elevated floral styling. Readers will learn the core methods of accordion pleating, petal curling, multi-bill blooming, and assembling coordinated mixed-media arrangements. Applying these safe folding methods ensures the bills remain fully spendable and intact while creating a stunning, artistic gift that leaves a lasting impression.
Why This Idea Is Trending or Useful
DIY money flowers have become a leading trend across modern gifting and celebration platforms because they offer an artistic, personalized alternative to basic greeting card cash envelopes. Modern gift-givers seek memorable presentation styles that reflect personal effort, creativity, and care while providing practical monetary value. For crafters and beginners alike, cash origami serves as an accessible, high-reward project requiring minimal specialized tools beyond crisp currency, basic florist wire, and floral tape. Because each flower can be customized using any bill denomination—from one-dollar bills to hundred-dollar notes—these designs adapt effortlessly to any gifting budget or milestone celebration, delivering high visual elegance and genuine surprise.
Materials and Preparation
Achieving sharp, clean blooms from currency requires proper preparation of both your workspace and the bills themselves. Essential tools include a smooth bone folder or wooden craft stick for pressing crisp folds, floral wire (20 to 24 gauge) for structural stems, green self-adhesive floral tape, wooden skewers, and small toothpicks for curling petal edges. Gather crisp, unwrinkled dollar bills from a local bank; freshly minted bills hold geometric folds and structural tension far better than worn, limp currency. Prepare a clean, dry workstation to prevent ink or dirt transfer. Never use liquid adhesives, super glue, staples, or permanent tape directly on genuine currency; instead, rely strictly on gentle folding tension, removable paper clips, and wire wrapping to protect the bills’ integrity.
Main Ideas Section
Idea 1: Classic Multi-Bill Origami Rose
How to Create
Select five crisp dollar bills to create a full, multi-layered blooming rose. Take the first bill, fold it in half horizontally, and tightly roll the four outer corners around a toothpick to create flared petal tips. Crimp the center of the bill vertically into an accordion fold and secure a loop of 22-gauge green floral wire snugly around the center pinch. Repeat this folding and wiring process with the remaining four bills. Cluster the wired petals together in an alternating concentric circle around a tightly rolled central bud bill. Twist the exposed wire tails together tightly beneath the base to form a rigid stem, wrapping the wire with green floral tape from the base down to conceal all metal. Gently shape the curled corners outward to mimic blooming rose petals.

Idea 2: Accordion-Pleated Dollar Bill Daisy
Setup Method
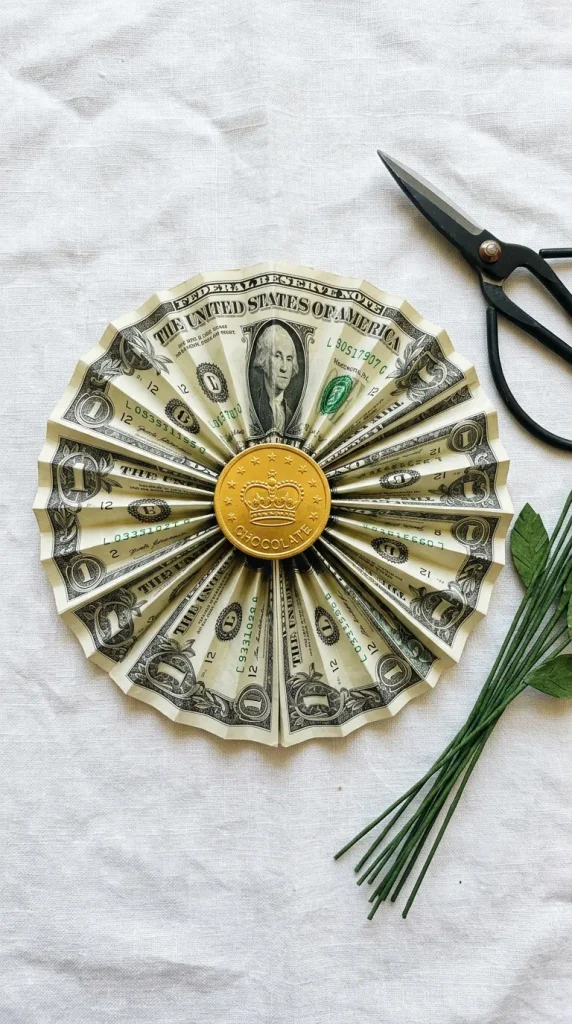
Take three crisp dollar bills and fold each one along its short edge into tight accordion pleats spaced roughly one-quarter inch apart. Fold each pleated bill in half at the center point to create a fan shape. Align the three folded accordion units side by side to form a complete 360-degree circle. Wrap a single piece of flexible floral wire around the inner central junction where all three bills meet, twisting the wire firmly underneath. Use tiny strips of low-tack removable double-sided tape or gentle friction to connect the touching side edges of the pleated fans. Attach a gold coin, foil-wrapped chocolate, or decorative craft bead to the center point to serve as the daisy’s seed disk, finishing with a wrapped floral stem.
Idea 3: Elegant Five-Petal Kusudama Bloom
Step-by-Step Guide
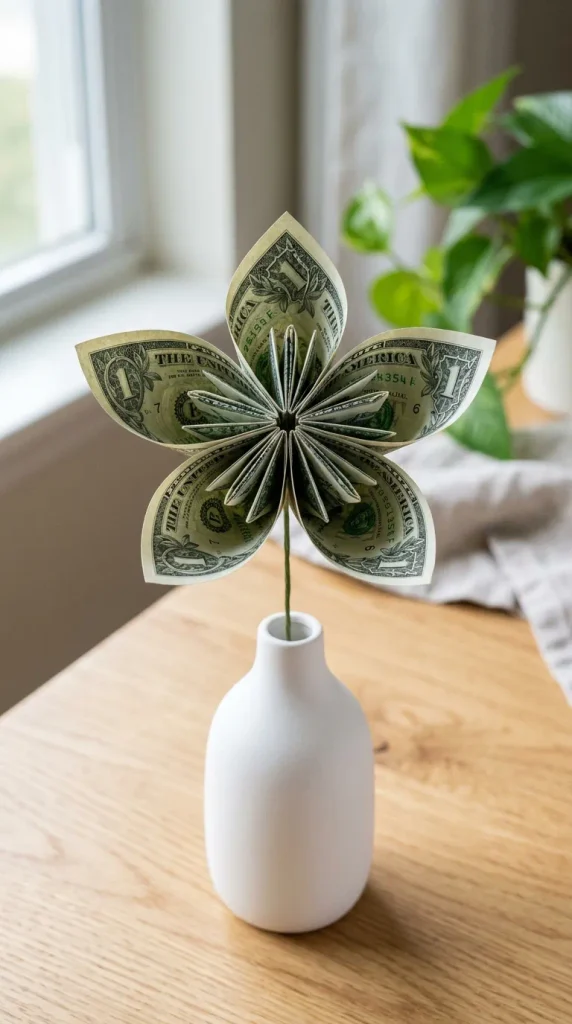
Construct five individual conical petals using five separate dollar bills based on traditional Kusudama modular origami. Fold a bill in half into a square footprint, then bring the bottom corners up to the top center to form a diamond shape. Fold the outer flaps outward along their outer creases, squash-fold the resulting triangles flat, and fold the top corner tips inward. Roll the left and right edges together into a hollow cone and secure the seam with a miniature removable craft glue dot on the inner margin. Repeat for all five bills. Cluster the five pointed cone bases together so the petals flare outward symmetrically. Secure the central base junction with floral wire and wrap the stem in green tape for a sculpted Japanese geometric bloom.
Idea 4: The Vibrant Money Lily (Calla Lily)
Execution Process
Lay a single crisp dollar bill flat on your work surface. Fold the lower left and right corners diagonally inward toward the center until their outer edges meet along the vertical centerline, creating an elongated kite shape. Fold the sharp bottom point upward slightly, then gently curve the wide upper edges around a smooth marker barrel to create a graceful, fluted funnel shape. Insert a length of floral wire tipped with a rolled yellow craft paper stamen or gold ribbon into the center of the cone. Pinch the lower tapered base of the bill tightly around the wire and stamen, wrapping the base firmly with green self-sealing floral tape to lock the conical lily shape permanently in place without tearing the paper fibers.

Idea 5: Layered Money Carnation Pom-Pom
How to Make
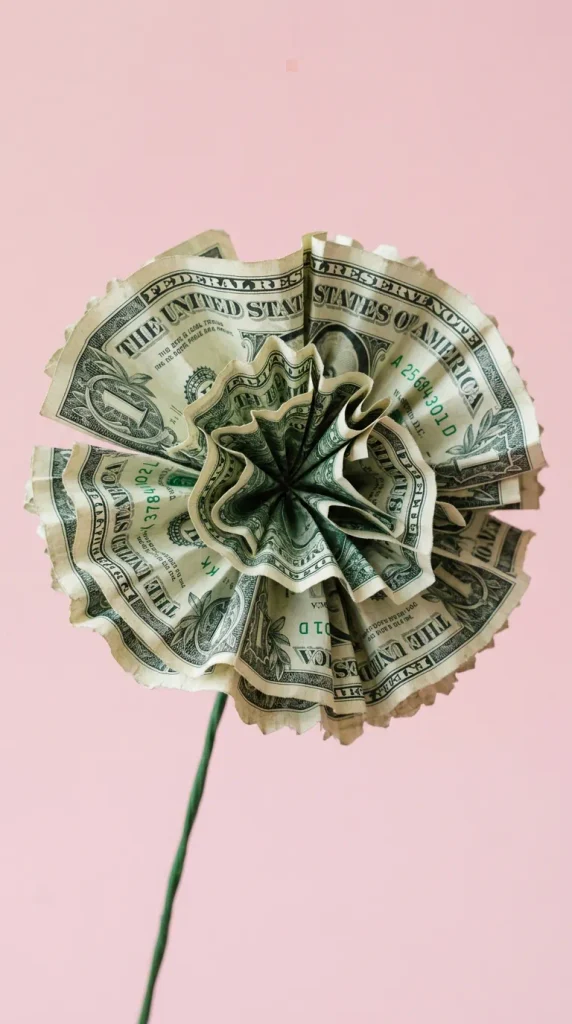
Stack four crisp dollar bills directly on top of each other in a neat, aligned pile. Fold the entire stack together into tight accordion pleats along the short edge, pressing each fold firmly with a bone folder. Wrap a 20-gauge floral wire tightly around the exact midpoint of the pleated stack, twisting the wire securely beneath the bundle. Cut small rounded or scalloped notches into the exposed outer paper corners if using faux craft bills, or gently curve the raw corners outward if using real currency. Carefully fan out the pleated sides into a round sphere, gently pulling and separating each individual bill layer upward and toward the center. Fluff the ruffled layers outward until they form a dense, textured carnation blossom.
Idea 6: The Spiral Dollar Bill Rosette
Step-by-Step Guide
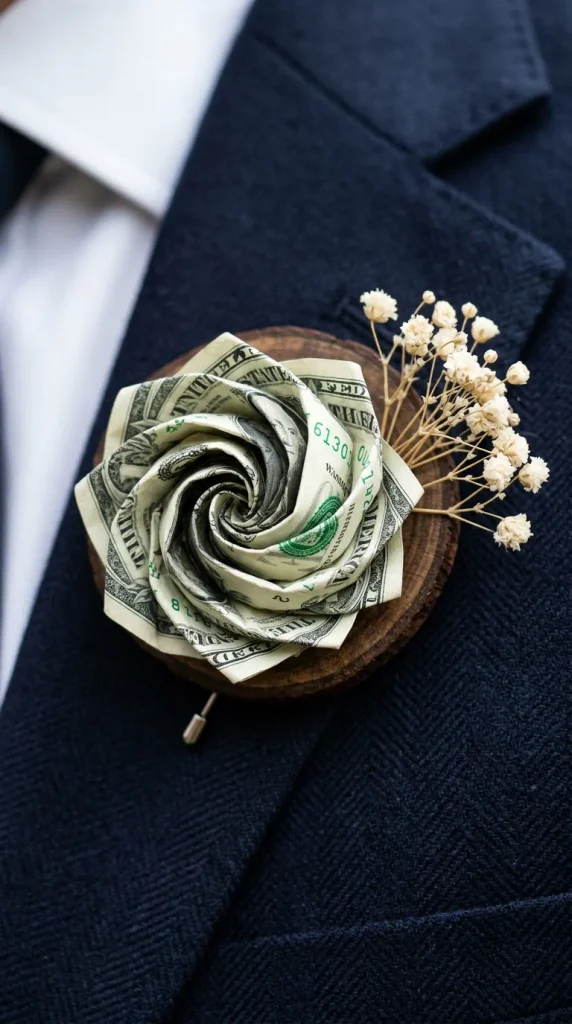
Begin with a single dollar bill laid horizontally. Fold the bill in half lengthwise to create a long, narrow strip. Starting from one short end, roll the folded edge tightly around the tip of a wooden skewer to form the rose core. As you continue rolling, twist the working strip backward at a forty-five-degree angle every half turn, forming overlapping angled petal folds that spiral outward from the core. Continue twisting and winding until the entire length of the bill is rolled into a compact rosette. Secure the bottom twisted base by wrapping a thin piece of craft wire tightly around the tail, then secure it to the wooden skewer with green floral tape. This compact flower is ideal for boutonnières and gift box toppers.
Idea 7: Delicate Dollar Bill Cherry Blossom
Setup Method
Fold a crisp dollar bill into sharp diagonal creases to establish a central square origami base. Fold the four corners inward toward the center point, creating a compact multi-layered diamond. Pinch the outer tips outward to form five distinct, shallow petal indentations around the perimeter. Use a toothpick to curl the petal edges slightly upward, giving the bloom a soft, bowl-shaped organic curve. Pierce the center of a small green cardstock calyx with a 24-gauge wire, thread the wire through the base fold of the bill, and secure it with a tiny drop of removable museum putty. Group three or four finished mini cherry blossom heads onto a natural woody branch to produce a delicate, blooming desktop display.
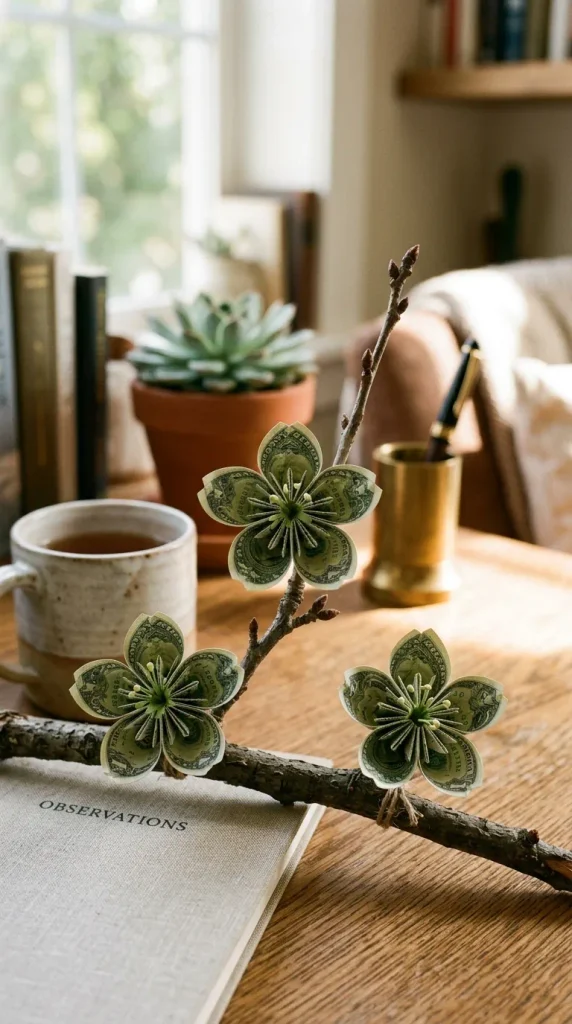
Idea 8: The Golden Sunflower Money Bloom
Execution Process
Construct a dramatic sunflower using six one-dollar bills and a large central gold chocolate medallion or commemorative gold coin. Accordion-pleat each bill finely along the long edge and fold them in half to create six flared fan petals. Arrange the six fans in a wide circle on a flat table, connecting their touching side folds with clear mini paperclips on the underside. Place the gold coin or chocolate medallion directly over the central opening, securing it with removable glue dots placed against the inner fold tips. Thread three lengths of green floral wire through the rear junction behind the coin to create a sturdy, heavy-duty stem. Wrap the wire and paper junctions with dark brown or green floral tape for a radiant, high-value sunflower.

Idea 9: Modern Geometric Dollar Bill Tulip
How to Make
Take two crisp dollar bills and fold each into a crisp three-dimensional triangular cup using standard modular origami box folds. Interlock the two folded bill units perpendicular to one another, sliding the corner tabs of the first bill into the exterior pockets of the second bill to form a hollow, four-sided tulip bulb. Gently pinch the four top corner points outward so the petals flare subtly like a natural spring tulip. Insert a thick wooden craft skewer wrapped in bright green floral tape upward into the bottom center opening of the interlocking bulb. Secure the base of the paper cup to the skewer with a hidden piece of green floral clay to keep the tulip standing upright and crisp.
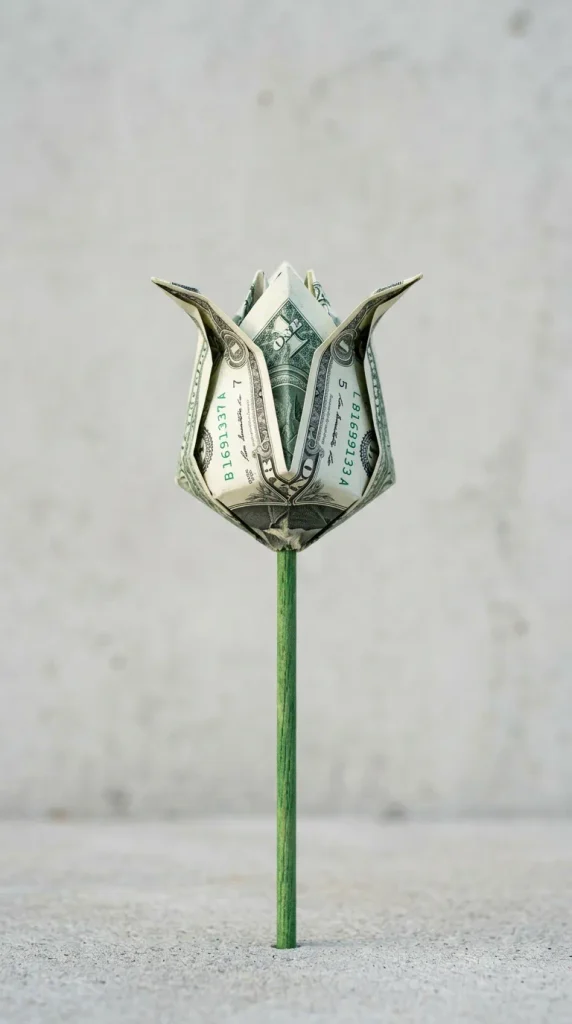
Idea 10: The Giant Mixed-Denomination Money Peony
How to Create
Assemble an extravagant, voluminous peony using eight to ten bills of mixed denominations ($1, $5, $10, and $20 notes) to vary petal gradients. Fold each bill into an accordion pleat along the short edge, curving the outer corners outward with a wooden craft stick. Divide the bills into three concentric tiers: three bills for the tight inner center, three bills for the middle ring, and four bills for the wide outer base. Wire each tier separately with thin floral wire, then nest the wired tiers together sequentially from smallest to largest. Twist all wire tails together underneath into a single heavy-duty stem. Gently tease and fluff the nested pleated layers outward into a massive, lush peony blossom measuring over five inches in diameter.

Common Beginner Mistakes and How to Avoid Them
A frequent beginner mistake when making money flowers is using standard transparent tape, hot glue, or staples directly on genuine currency. Adhesives and staples tear delicate bill fibers, leave sticky residues, and legally deface currency, making the money unspendable for the recipient. Always secure bill folds using non-damaging mechanical tension, thin floral wire wrapped over pinched creases, or removable glue dots designed for temporary paper bonding. Another common error is using limp, worn-out bills; old bills lack the crisp structural sizing needed to hold origami creases, resulting in droopy, misshapen flowers. Exchange older notes at a local bank for crisp, uncirculated currency before starting your project. Additionally, avoid wrapping floral wire too tightly across bill edges without crimping first, which can accidentally slice paper borders.
Practical Tips for Better Results
To achieve professional, boutique-quality money flowers, always pre-crease your folds using a smooth bone folder rather than fingernails. Firm, even pressure produces razor-sharp geometric lines without transferring natural skin oils onto the green ink. When wrapping floral stems, stretch your floral tape slightly as you wind it diagonally down the wire; stretching activates the internal wax adhesive, ensuring a tight, smooth, moisture-free bond over bare metal. Integrate fresh or faux botanical greenery—such as baby’s breath, preserved seeded eucalyptus, or faux salal leaves—around the money blooms. The contrast between lush green foliage and crisp currency elevates the arrangement, making it look like a curated floral bouquet rather than loose paper craft.
Styling, Presentation, or Organization Ideas
Presenting DIY money flowers effectively elevates the overall gifting experience and protects the delicate paper folds during transport. Arrange completed money blooms into a handheld bouquet wrapped in frosted pastel floral paper, tied securely with a wide satin ribbon bow. Alternatively, insert the wired money flower stems into a block of dry floral foam anchored inside a modern ceramic vase or rustic wooden gift box, filling surrounding gaps with faux moss and silk accent blooms. If crafting a single statement bloom, place it inside a clear acrylic gift box or glass cloche dome accented with fairy lights. Storing extra pre-cut floral wire, skewers, and rolled ribbons in divided clear craft organizers ensures a clean, streamlined assembly workflow for future celebration gifts.
Budget or Time Planning
Crafting money flowers offers total flexibility over your gifting budget because the primary expense is determined entirely by the cash value you choose to incorporate. Using one-dollar bills keeps the base monetary cost under ten dollars per flower, while utilizing ten, twenty, or fifty-dollar notes allows you to create high-value presentation gifts for major milestones. Craft supplies—such as floral wire, tape, skewers, and ribbons—cost roughly five to ten dollars in total and yield enough materials for dozens of blooms. In terms of time, a basic single-bill flower takes approximately five to ten minutes to fold and stem. A complex multi-bill arrangement or complete bridal-style bouquet typically requires between one and two hours of assembly time.
Creative Expansion and Advanced Inspiration
Once you master basic folding and stemming techniques, expand your money floral designs by integrating personalized themes and mixed-media accents. Combine money roses with preserved forever-roses in a luxury circular hatbox arrangement, blending real botanical petals with folded currency for dramatic visual depth. Incorporate custom graduation cap toppers made of folded black cardstock directly onto the center of money blooms for senior commencement gifts. You can also wire mini LED fairy lights directly along the floral stems, illuminating the paper folds and watermarks from within during evening celebrations. These creative upgrades transform simple cash origami into a bespoke, gallery-worthy centerpiece that turns monetary gifting into an unforgettable work of art.