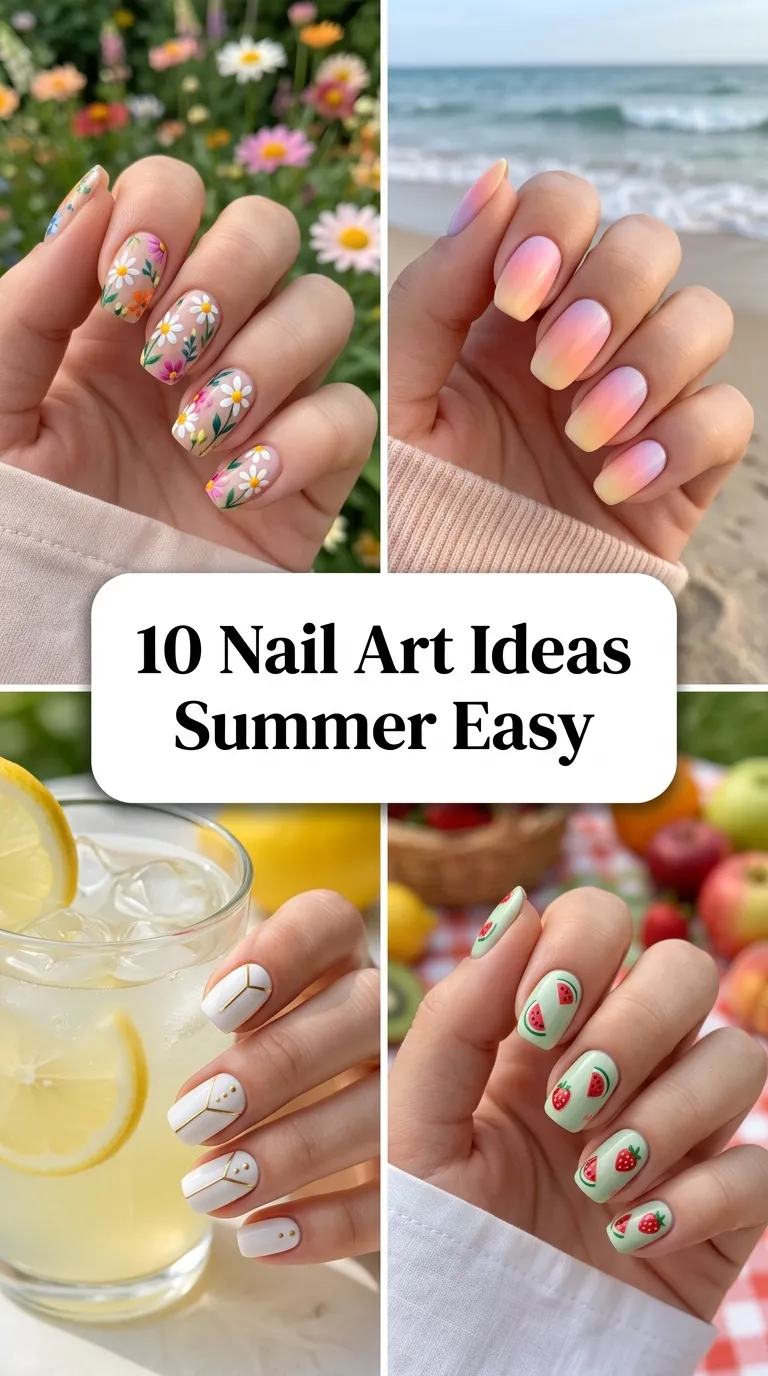
10 Nail Art Ideas Summer Easy
Sun-Kissed Tips: 10 Easy Summer Nail Art Ideas
Creating a gorgeous summer manicure doesn’t require hours at a luxury salon or an advanced toolkit. This guide details ten versatile, easy summer nail art ideas that capture the vibrant, sun-drenched energy of the season while keeping the process incredibly simple. You will learn how to use basic household tools (like toothpicks and bobby pins) to map out crisp geometric shapes, manage quick-drying polishes, and achieve a professional, long-lasting finish. Whether you want a punchy neon pop for a beach weekend or a subtle, minimalist style pastel look for the office, these high-contrast designs prove that salon-grade nail styling is entirely realistic for beginners.
Why Minimalist Summer Nail Art Is Rising
Effortless, low-maintenance nail designs have captured immense visibility across modern aesthetic trends, demonstrating a prominent shift toward mindful, high-impact style. These trending ideas are exceptionally popular because they offer maximum visual reward with minimal margin for error—perfect for anyone lounging by the pool or packing light for a vacation. The distinct focus on negative-space layouts, abstract squiggles, and punchy accent colors carries an incredible DIY appeal. This accessibility ensures that keeping your hands looking polished and summer-ready is effortless without spending a fortune on complex gel extensions or intricate hand-painted detailing. By emphasizing clean borders and high-gloss finishes, these creative concepts prove that simple nail care can serve as a stunning accessory that elevates your entire summer wardrobe.
Essential Materials and Nail Prep
Launching a successful DIY manicure requires thorough preparation, accurate canvas shaping, and gathering your tools before opening a single bottle of polish. Collect your essential nail station equipment, including a fine-grit nail file, a wooden cuticle pusher, rubbing alcohol pads, a high-quality base coat, a glossy top coat, a fine-tipped striping brush, and a standard bobby pin to use as a dotting tool. Your primary color palette for a vibrant summer vibe typically features bright citrus neons, soft sky pastels, crisp cream white, and a solid sheer nude base. During the initial prep phase, file your nails into a uniform rounded or squoval shape, wipe away natural oils completely using an alcohol pad, and apply a thin layer of base coat to prevent staining. Developing a clean, organized workspace beforehand ensures your design process proceeds smoothly, preventing accidental smudges and keeping your manicure looking flawless.
Ten Practical and Easy Summer Nail Art Concepts
Idea 1: The Neapolitan Pastel Skittle Gradient
Execution Method
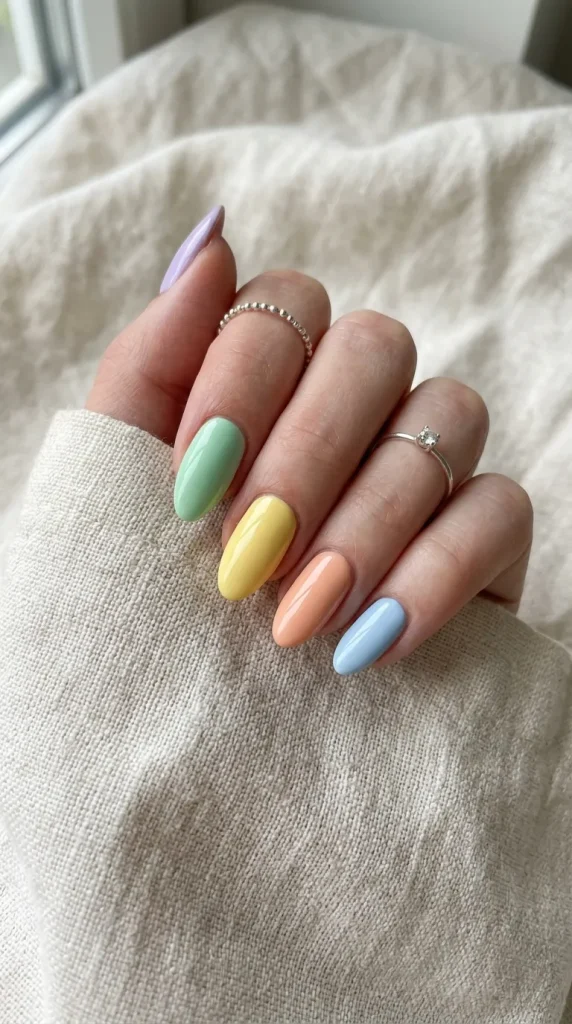
To establish an incredibly fun, colorful visual statement that requires zero fine-line painting skills, try a multi-toned pastel skittle manicure. Select five complementary pastel polishes—such as lavender, mint green, buttery yellow, soft peach, and baby blue. Paint each individual fingernail on your hand a completely different solid color, applying two thin coats for full, opaque coverage. This easy project focuses entirely on a cohesive color curation rather than complex art techniques. Top with an ultra-glossy top coat to pull the playful, high-contrast look together into a seamless minimalist design statement that matches any summer outfit.
Idea 2: The Bobby Pin Neon Citrus Dot Matrix
Step-by-Step Guide
Introduce a punchy, graphic accent to a classic neutral base by engineering clean, symmetrical polka dots using a standard bobby pin. Apply a sheer nude or clear base coat across all nails and let it dry completely. Dip the round plastic ball end of a standard bobby pin directly into a drop of vibrant neon orange or bright lemon yellow polish. Press the pin tip gently onto the center base of each nail just above the cuticle line, lifting straight up to leave a perfect, crisp circular dot. This beginner-friendly layout provides high-end contemporary appeal with an everyday household item.

Idea 3: The Sheer Nude and Crisp White Modern French
Execution Process
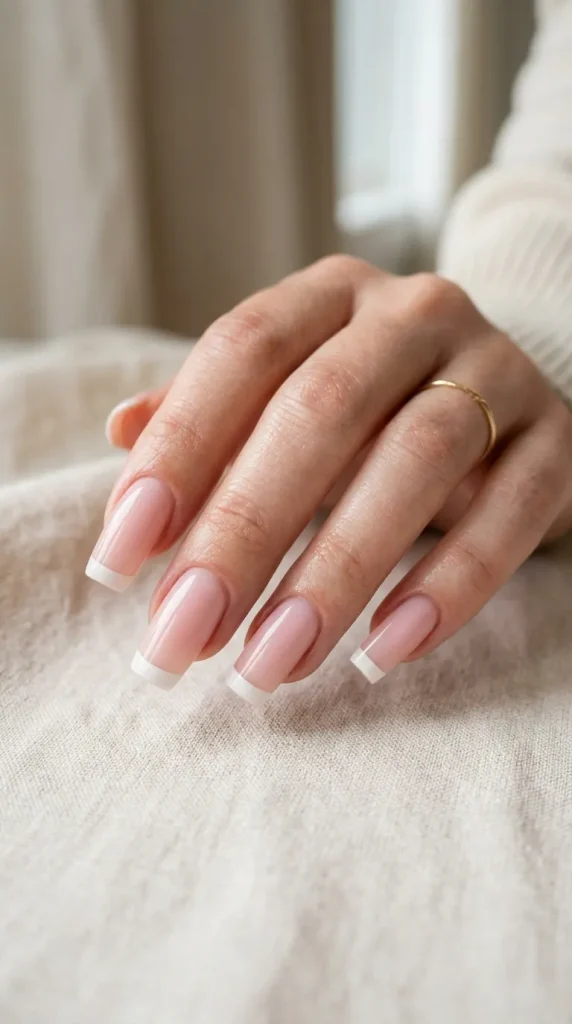
Incorporate a timeless, clean girl aesthetic onto your fingertips by reimagining the traditional French manicure with an easy, low-profile modern tweak. Coat your nails in a soft, semi-sheer milky pink or nude base to establish an immaculate canvas backdrop. Instead of fighting with a traditional brush to paint a perfect crescent curve, use the side of the polish brush to swipe a thin, straight line of crisp cream white horizontally across the very tip of each nail. This linear modification elongates the appearance of short nails effortlessly, delivering a sharp geometric look that feels intensely chic and professional.
Idea 4: The Abstract Coconut-Milk Swiggle
How to Create
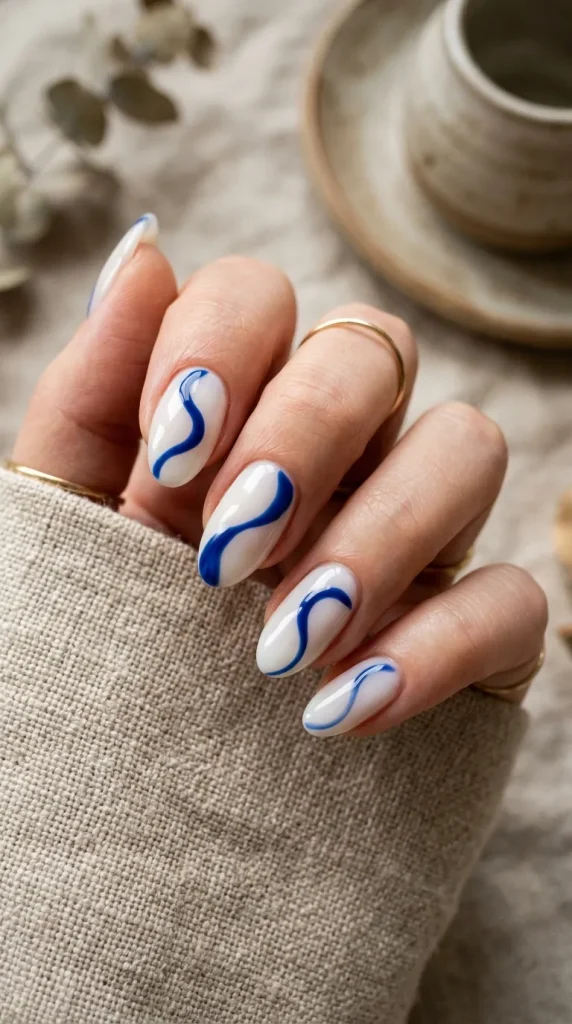
Nurture an organic, playful artistic flair across your hands by painting fluid, free-form abstract lines that celebrate the breezy movement of summer. Apply a glossy, semi-translucent coconut-milk white polish across your entire nail bed as your clean color baseline. Dip a fine-tipped striping brush or a toothpick into a contrasting shade of rich terracotta or bright cobalt blue. Paint a single, organic wavy line traveling diagonally from the bottom corner of the nail up to the opposite tip, letting your hand move freely to create unique shapes on each finger. This forgiving layout completely eliminates the pressure of perfection.
Idea 5: The High-Contrast Neon Tip Half-Moon
Setup Method
Optimize your nail length visually while embracing bold seasonal color trends by focusing your art exclusively along the negative space of your cuticles. Apply a clean, clear top coat over raw, well-manicured nails to let your natural nail bed serve as a minimalist backdrop. Use a detail brush to paint a small, precise half-moon crescent shape directly over the natural lunula at the base of your nail using a fiery neon pink or electric lime green polish. This organized spatial layout keeps the majority of your nail entirely bare, ensuring that as your nails grow out over the summer weeks, the manicure looks entirely intentional without a messy regrowth line.

Idea 6: The Sun-Drenched Lemon Slice Accent
Step-by-Step Guide
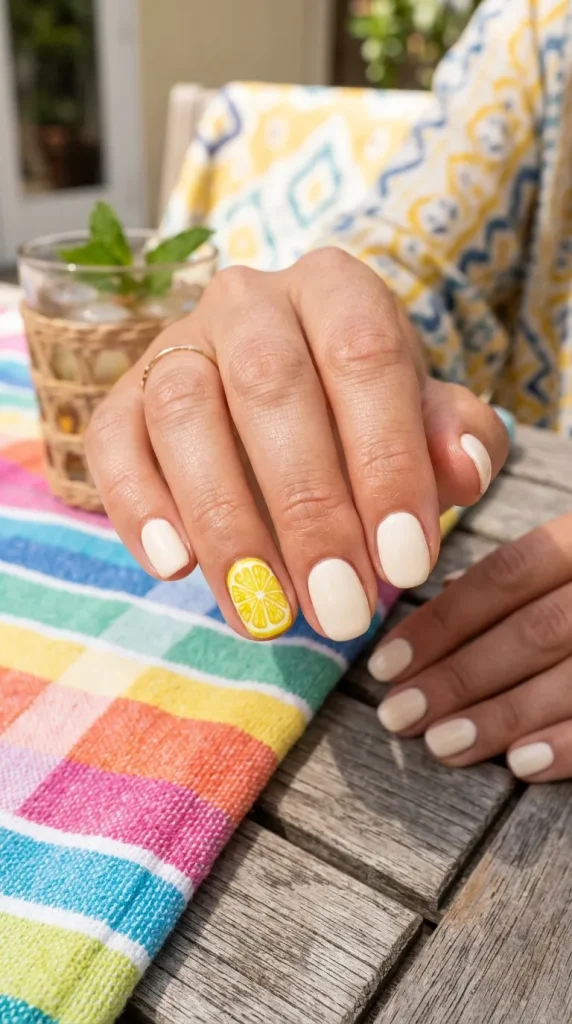
Introduce instant whimsical charm and an upscale vacation vibe to your hands by customizing a single accent nail with a simple fruit illustration. Paint nine of your fingernails in a solid, clean coat of crisp white or soft cream polish to keep the broader presentation looking sophisticated. On your ring fingernail, use a dotting tool to paint a vibrant yellow circle, then use a toothpick dipped in white polish to draw a small cross and diagonal lines inside, instantly turning the yellow dot into a fresh lemon slice. This playful handmade decoration alternative updates a traditional manicure with an elegant, focused pop of personality.
Idea 7: The Minimalist Metallic Gold Summer Horizon
Execution Process
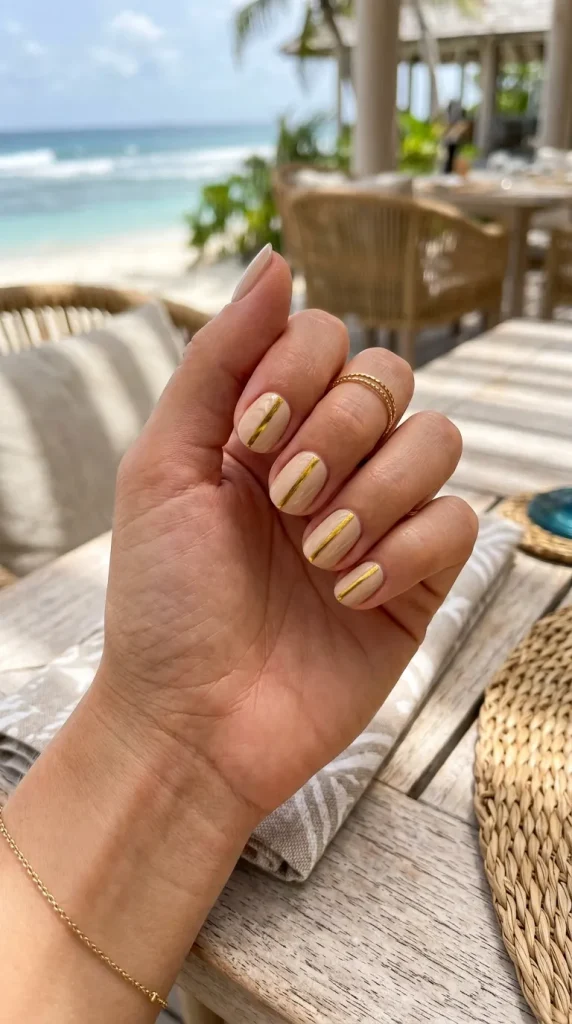
Achieve a highly sophisticated, beach-resort aesthetic across your hands by layering a single, striking metallic accent line over a raw base. Paint your nails in two coats of an ultra-clean, opaque sand-beige or crisp white polish, letting the layers cure completely. Dip your fine striping brush into a high-shine metallic gold polish, drawing a single, ultra-thin horizontal line straight across the dead center of each nail bed. This architectural detail catches natural outdoor daylight beautifully under the sun, injecting a subtle, luxurious jewelry-like element into your hands with a simple, steady brush stroke.
Idea 8: The Retro Gingham Picnic Accent
How to Create
Achieve an ultra-cozy, classic cottagecore atmosphere across your fingertips by painting a timeless gingham plaid check accent pattern on a single nail. Paint your nails in a solid coat of soft, dusty rose or cornflower blue polish. Choose an accent nail—such as the thumb or index finger—and use a striping brush to paint two vertical white lines and two horizontal white lines across the nail to form a simple grid. The intersecting lines form an instant picnic-inspired gingham pattern that looks beautifully intricate but requires only simple, straight lines to execute, giving your hands a charming handmade look.

Idea 9: The Organic Turquoise Stone Splatter
Setup Method
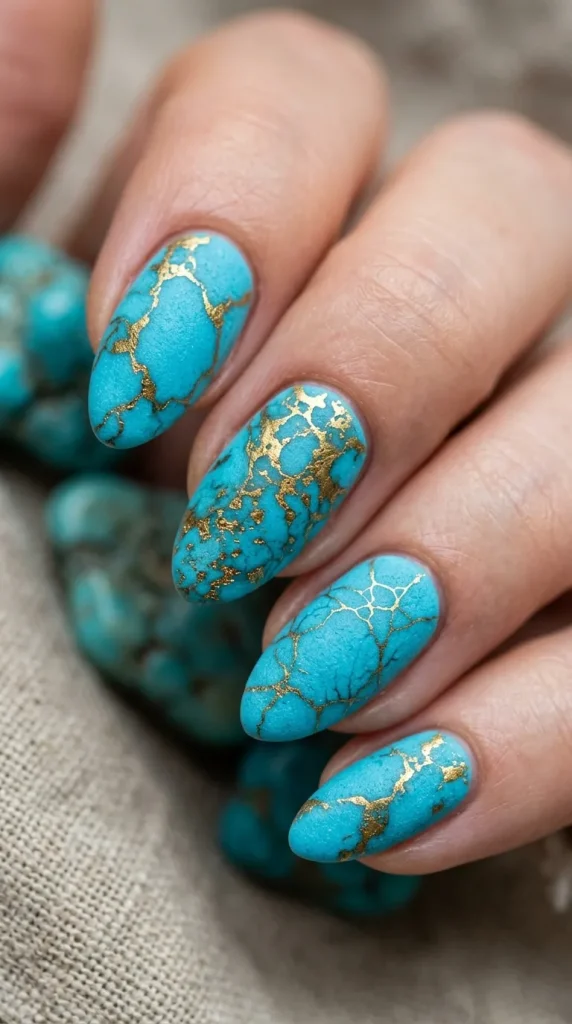
Utilize unique texturing techniques creatively to mimic the organic veining of precious summer gemstones like turquoise across your nails. Paint your nails in two coats of a vibrant, solid turquoise or robin’s egg blue polish to establish your base color. Dip a crumpled piece of plastic kitchen wrap tightly into a small drop of metallic gold or deep charcoal gray polish, blotting the excess color off onto a paper towel first. Lightly dab the textured plastic wrap flat onto your dried turquoise base to leave irregular, organic mineral flecks that transform your nails into miniature polished stone relics.
Idea 10: The Continuous Monochrome Neutral Palette
How to Make
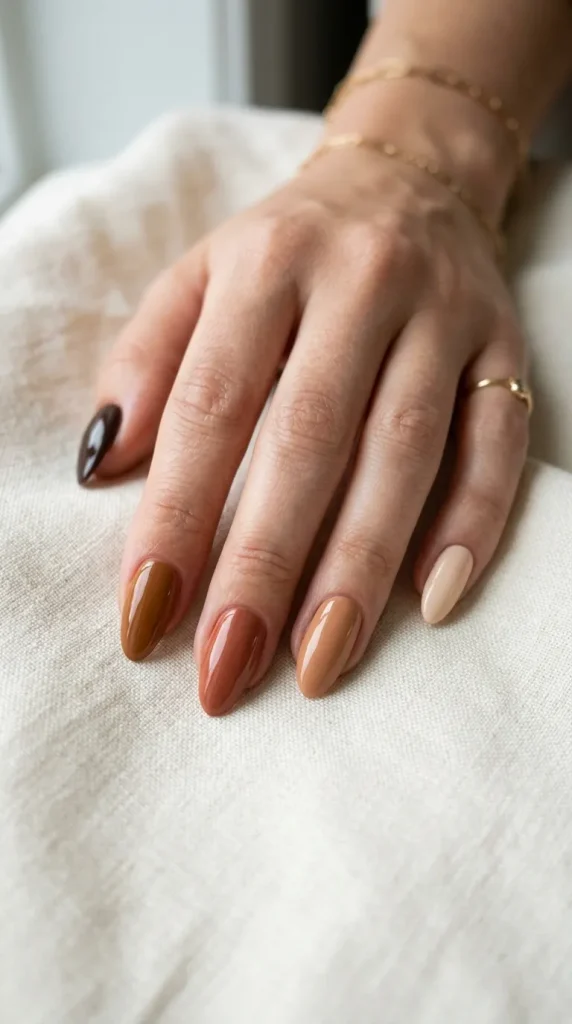
Achieve a highly seamless, elongated, and elegant look across your hands by implementing a strict tone-on-tone monochromatic gradient theme. Select five distinct polishes that stay firmly within the same color family, such as varying shades of warm tan, terracotta, rich caramel, soft cream, and deep espresso. Paint each finger in ascending order from darkest to lightest to form a continuous, sophisticated ombre transition across your hand. This disciplined color organization concept delivers a luxury profile that makes your hands look incredibly elongated, cohesive, and perfectly aligned with a chic minimalist style.
Common Beginner Mistakes and How to Avoid Them
When executing new easy summer nail art ideas, beginners frequently make the mistake of applying thick, heavy layers of polish in an effort to get instant color opacity. Thick coats of polish trap solvent bubbles underneath, which leads to immediate smudging, a long drying time, and a messy, unorganized look that ruins your hard work. Avoid this common pitfall by enforcing a strict “thin coat rule”: always wipe the excess polish off your brush completely before swiping, applying two or three paper-thin layers instead of one thick one, allowing each layer to dry for three minutes before applying the next. Another frequent error is skipping the sealing phase along the free edge of your nail. Summer activities like swimming and beach trips subject your hands to heavy wear, leading to rapid chipping along the tips; always cap the free edge by running your top coat brush horizontally directly across the very top rim of your nail to lock the design in tightly for weeks.
Styling, Presentation, and Long-Term Manicure Maintenance
Maintaining a visually pristine and long-lasting manicure over the warm months relies entirely on implementing highly structured, disciplined care systems and clean preservation habits. Group your extra polishes, cleanup brushes, and nail files inside a single matching storage pouch kept in a cool, dark drawer to prevent heat from thickening your lacquers. Keep your hands looking immaculate and salon-grade by applying a nourishing drop of organic jojoba or sweet almond cuticle oil to the base of your nails every single evening before bed. If you accidentally get polish on your surrounding skin during the art phase, do not pick at it; instead, dip a small angled makeup brush directly into pure acetone and trace the border of your nail cleanly to erase mistakes instantly. These disciplined maintenance habits ensure your creative projects remain highly functional, clean, and beautifully aligned with your broader style goals.
Creative Expansion and Advanced Inspiration
Once your primary easy summer nail art configurations function perfectly, you can explore advanced stylistic and texture integrations to further customize your look. Consider experimenting with a matte top coat finish over your neon dots or abstract squiggles to transition the high-shine polish into a modern, velvety ceramic texture that looks incredibly high-end. You can integrate subtle, ultra-fine metallic nail stickers or micro-pearls pressed directly into your wet top coat layer to add an elegant, three-dimensional layer without adding complex freehand brushwork clutter. Upgrading a simple glossy skittle gradient by adding an ultra-thin frame border line around the entire perimeter of a single accent nail delivers a luxurious, dynamic dimension to your hands. As your styling capabilities grow over the season, the modular nature of using simple dotting tools and striping brushes allows you to swap out colors effortlessly, providing endless opportunities for ongoing design inspiration.