10 vintage kids room ideas

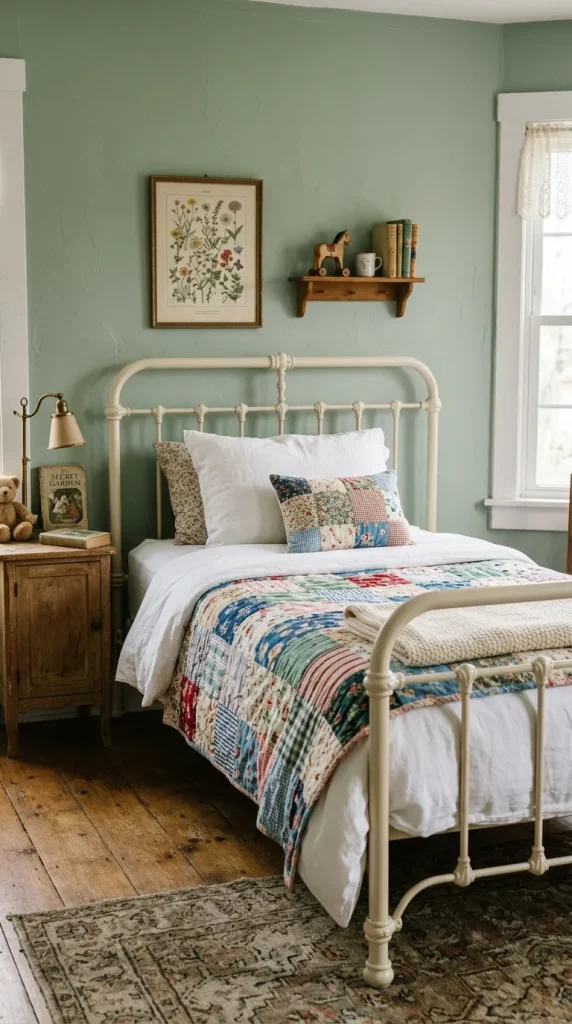
Idea 1: The Classic Iron Bedstead Revival
Setup Method
Transform the focal point of the bedroom by introducing a restored wrought iron or brass spindle bed frame, which instantly establishes an authentic mid-century or Victorian atmosphere. To execute this concept properly, hunt for a sturdy vintage frame at local estate sales or online marketplaces, ensuring the metal joints are completely stable and rust-free. Sand away any rough spots or flaking paint, then apply a fresh coat of rust-inhibiting, child-safe spray paint in a matte black, cream, or muted sage green finish. Pair the frame with a brand-new, modern mattress to guarantee proper orthopedic support and compliance with modern fire safety regulations. Dress the mattress in crisp, white cotton linens, a lightweight patchwork quilt, and a few textured throw pillows to soften the metallic lines of the frame. This setup method provides a durable sleeping arrangement that anchors the entire room design, offering a perfect backdrop for changing seasonal bedding over the years.
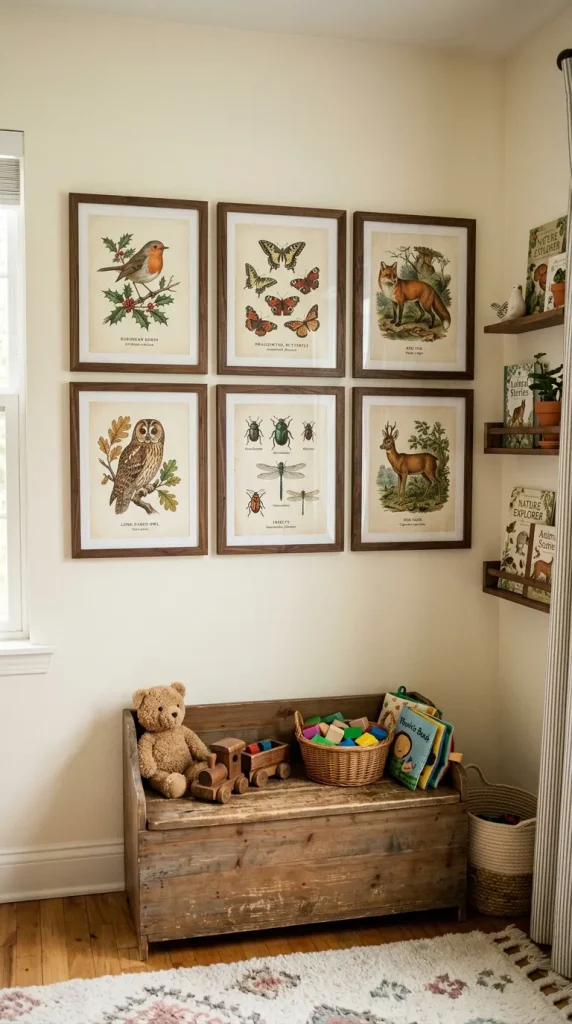
Idea 2: Botanical and Zoological Gallery Walls
Step-by-Step Guide
Creating an educational and visually stunning gallery wall using reproduction antique botanical prints or vintage zoological illustrations offers a sophisticated way to fill large vertical spaces. Start by selecting a series of six to eight matching or complementary illustrations featuring birds, forest animals, butterflies, or historical maps printed on thick, textured paper. Source inexpensive wooden frames from thrift stores, then sand and stain them with a uniform dark walnut or oak finish to create a cohesive collection. Use a level and painter’s tape to map out a precise grid layout on the floor before hammering any hooks into the wall to prevent unnecessary damage. Hang the framed prints at the child’s eye level to encourage observation, ensuring each frame is tightly secured with heavy-duty mounting hardware. This easy project introduces rich colors and academic interest into the room, serving as a quiet, screen-free source of visual entertainment and early learning.
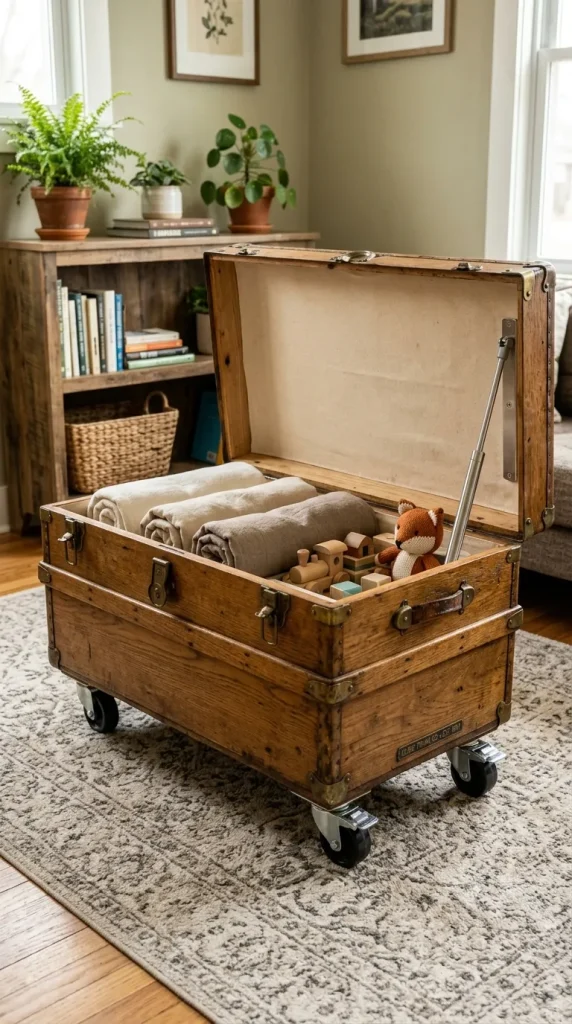
Idea 3: Upcycled Antique Toy Chest Storage
How to Make
Repurpose an old wooden shipping crate, steamer trunk, or traditional blanket chest into a beautiful, functional storage solution for blankets, books, and loose toys. Begin by thoroughly scrubbing the interior and exterior of the chest with a mixture of water and white vinegar to eliminate any lingering musty odors. Sand down the entire exterior surface to remove old splinters, then seal the wood with a clear, water-based polyurethane coating to preserve its natural grain safely. Install modern safety hinges that prevent the heavy lid from slamming shut unexpectedly, protecting small fingers during busy play sessions. For added mobility, screw four heavy-duty caster wheels onto the bottom of the chest, allowing it to glide easily across hardwood floors or low-pile rugs. The finished trunk provides an authentic piece of history that neatly organizes clutter while doubling as a sturdy bench seat for reading books.
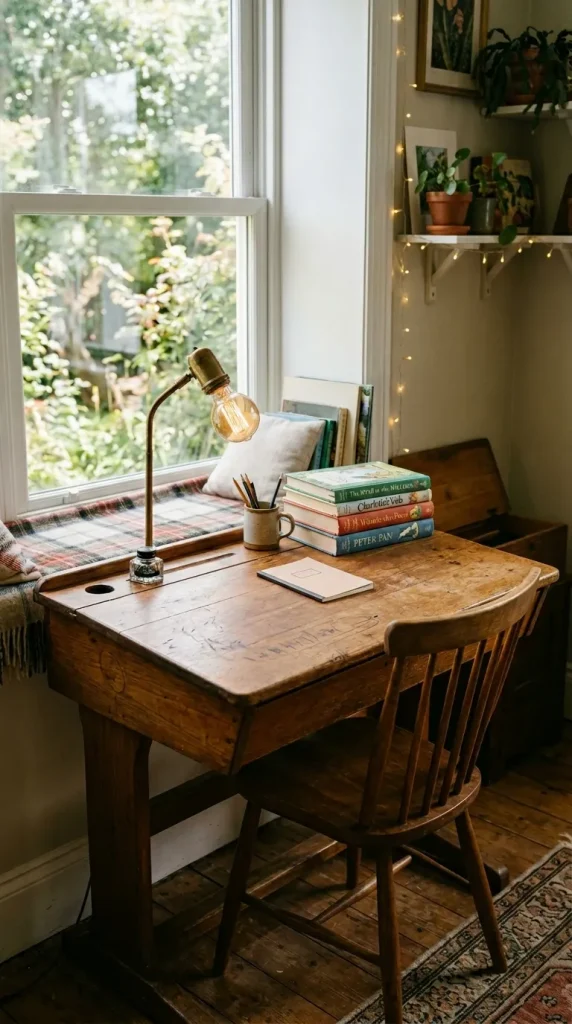
Idea 4: Nostalgic Reading Corner with Schoolhouse Desk
Execution Process
Design an enchanting, dedicated reading nook centered around a mid-century wooden schoolhouse desk, complete with a built-in inkwell or a lift-top storage compartment. Position the desk near a window to maximize natural light, ensuring there is plenty of clearance for the child to pull out the chair comfortably. Clean the wood surface with oil soap to restore its original luster, leaving small character marks like faint pencil lines or dents to preserve its historical story. Place a small, vintage-style task lamp with a warm LED bulb on the desktop to provide focused illumination for evening drawing or reading sessions. Arrange a low, open-faced wooden bookcase nearby to hold classic storybooks with illustrated fabric covers, making them highly accessible to little hands. This execution process creates a structured, quiet zone within the playroom that inspires independent study and creative writing while celebrating historical educational design.
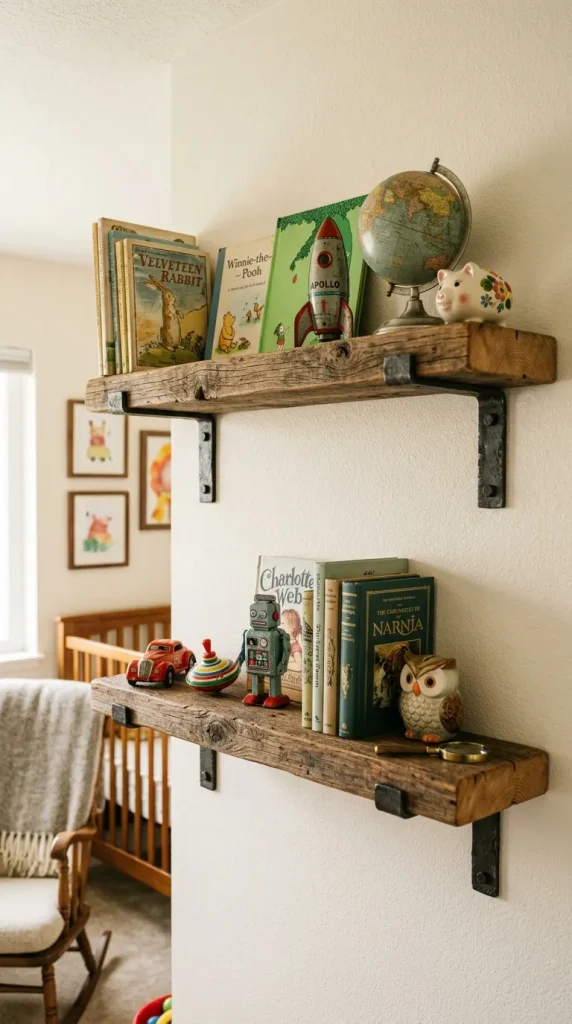
Idea 5: Reclaimed Floating Wooden Bookshelves
How to Create
Utilize architectural salvage pieces or thick planks of raw barn wood to construct rustic floating shelves that display vintage toys and heirloom storybooks beautifully. Cut the reclaimed wood planks to your desired lengths, then sand the edges smooth to prevent splinters while keeping the weathered surface texture intact. Apply a coat of natural beeswax sealer to enrich the deep wood tones and protect the surface from dust, fingerprints, and moisture over time. Mount heavy-duty, industrial iron brackets directly into the wall studs to provide the maximum weight capacity for heavy collectible books and ceramic coin banks. Arrange the books with their covers facing forward, interspersed with small vintage items like tin wind-up toys, old globes, or antique alphabet blocks. This wall setup frees up valuable floor space while transforming ordinary storage into a dynamic piece of wall decor that showcases prized childhood possessions.
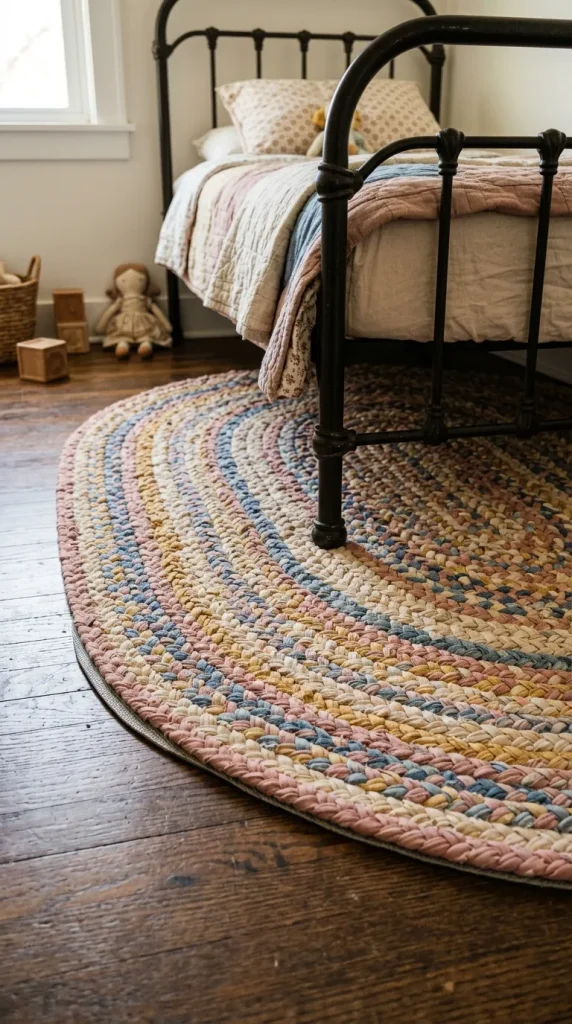
Idea 6: Pastel Rag Rug Tapestry and Flooring
Setup Method
Introduce warmth, soft texture, and a burst of historical color to the bedroom floor by layering traditional woven rag rugs or braided oval carpets. Look for rugs made from 100% recycled cotton scraps in soft pastel tones like dusty rose, washed denim, or pale mustard to maintain a gentle aesthetic. Position a large braided rug directly beneath the bed frame, extending it outward into the room to create a soft landing spot for bare feet each morning. Place a high-quality, non-slip rubber pad underneath the entire surface of the rug to prevent dangerous bunching or sliding during energetic playtime. These textiles are excellent for kids’ rooms because they are highly durable, easy to spot clean, and can often be machine-washed on gentle cycles. The woven texture adds a cozy, handmade dimension to the floor space, effectively tying together the different colors used throughout the room’s wall decor and bedding.
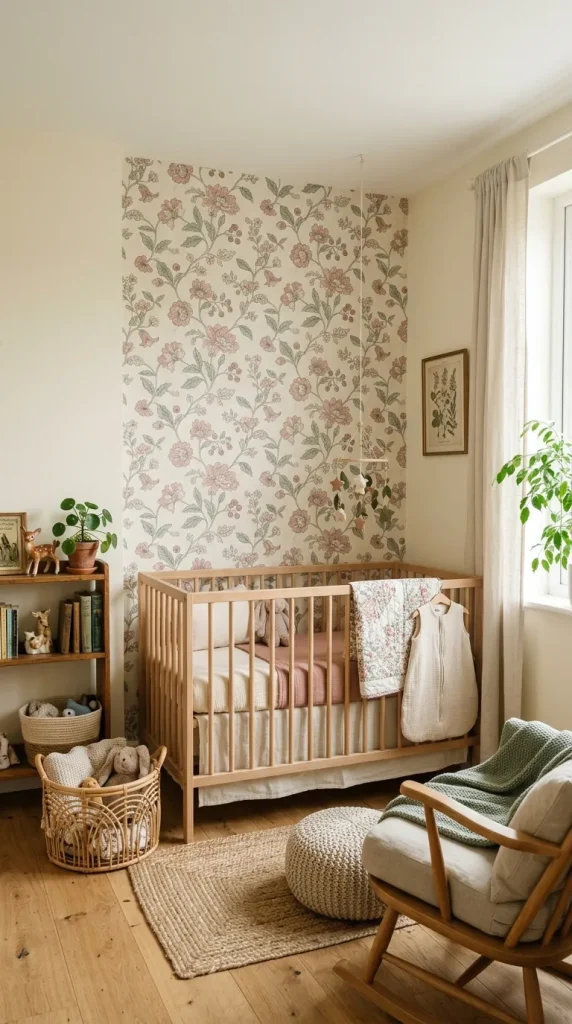
Idea 7: Heritage Wallpaper Accent Wall
Step-by-Step Guide
Install a vintage-inspired wallpaper featuring delicate floral trails, classic gingham checks, or subtle woodland motifs on a single accent wall to establish deep visual character. Select a high-quality, prepasted or peel-and-stick wallpaper option, making sure the product is entirely free of PVC, phthalates, and harsh chemical solvents. Prepare the wall surface by patching any drywall holes, sanding down rough patches, and wiping away dust with a damp microfiber cloth for optimal adhesion. Measure and cut the wallpaper panels carefully, adding a two-inch allowance at the top and bottom to ensure a perfect pattern alignment along the seams. Use a smooth plastic wallpaper squeegee to press out any trapped air bubbles, working systematically from the center of each panel outward to the edges. This step-by-step installation delivers a massive visual impact, turning an ordinary wall into an artistic backdrop that honors traditional interior design movements.
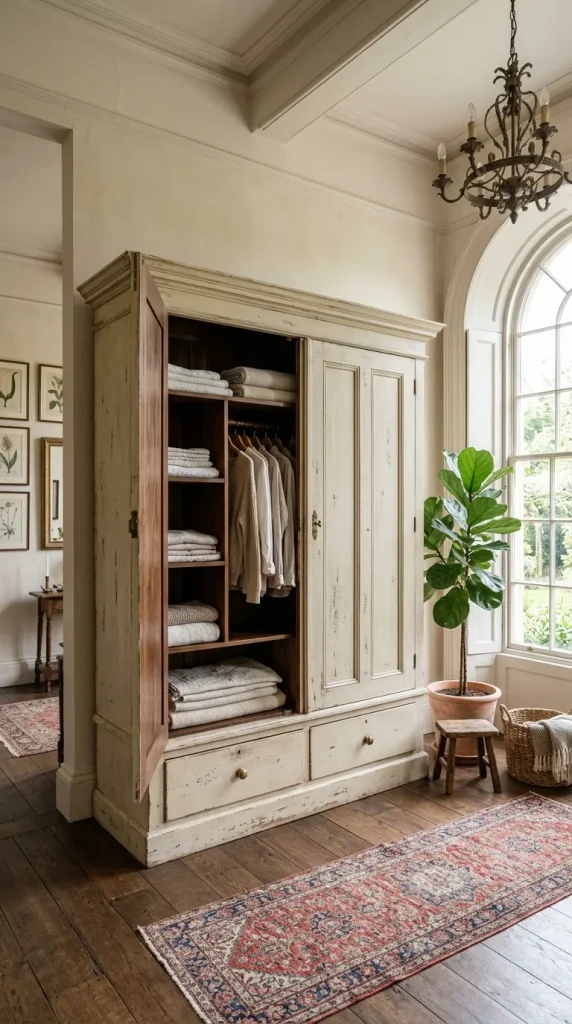
Idea 8: Repurposed Vintage Wardrobe Closets
Execution Process
Replace standard modern closets with a freestanding, antique wooden wardrobe or armoire to handle clothing storage while adding tremendous architectural height to the space. Look for a wardrobe made from solid pine or oak, checking that the doors open smoothly and that the original locks or handles are securely attached. Line the interior shelves with scented drawer liners or classic patterned paper, then install a sturdy closet rod at an accessible height for children’s clothes. Paint the exterior of the armoire in a soft, distressed chalk paint finish, or leave the original dark wood stain intact to create a bold contrast against light walls. Store seasonal clothing, bulky blankets, and board games inside the spacious lower drawers to keep them organized and completely hidden from view. This execution process provides a substantial furniture piece that anchors empty corners, offering far more storage flexibility than typical modern shelving units.
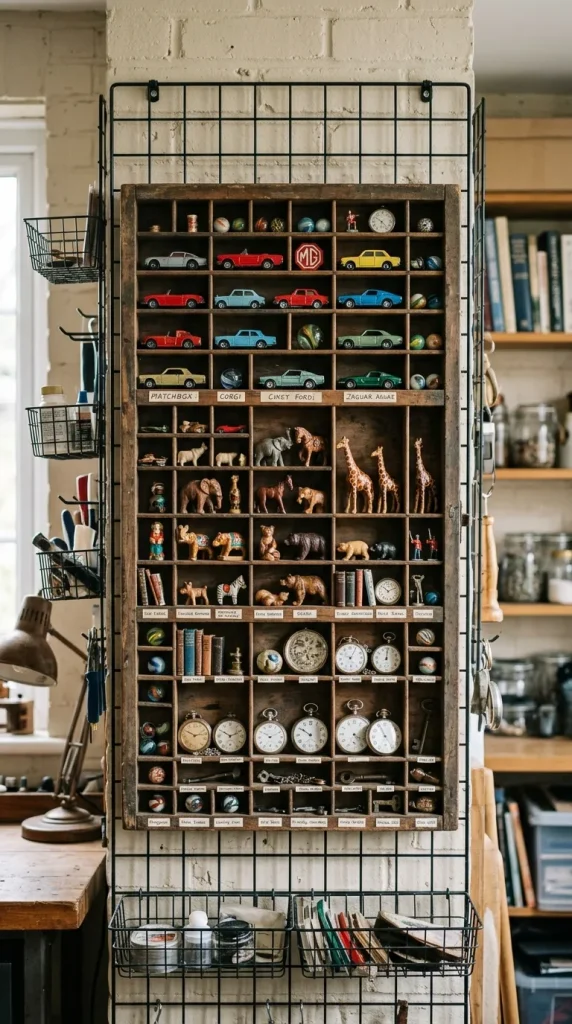
Idea 9: Retro Toy Display on Apothecary Shelves
How to Create
Utilize an old apothecary cabinet or a multi-drawer printer’s tray mounted to the wall to create a fascinating showcase for tiny collectible vintage toys. Clean the small cubbies thoroughly with a soft brush to remove dust, then mount the unit securely at a height where children can admire the contents safely. Fill the individual compartments with classic miniature items such as lead-free die-cast metal cars, carved wooden animals, antique marbles, and old pocket watches. This storage method keeps tiny, delicate items organized and out of reach of very young children who might accidentally swallow small parts. For older kids, it serves as an engaging sorting project where they can categorize their favorite trinkets by color, material, or historical era. The intricate grid pattern of the apothecary shelves introduces a captivating graphic design element to the walls, celebrating the beauty of historical collecting hobbies.
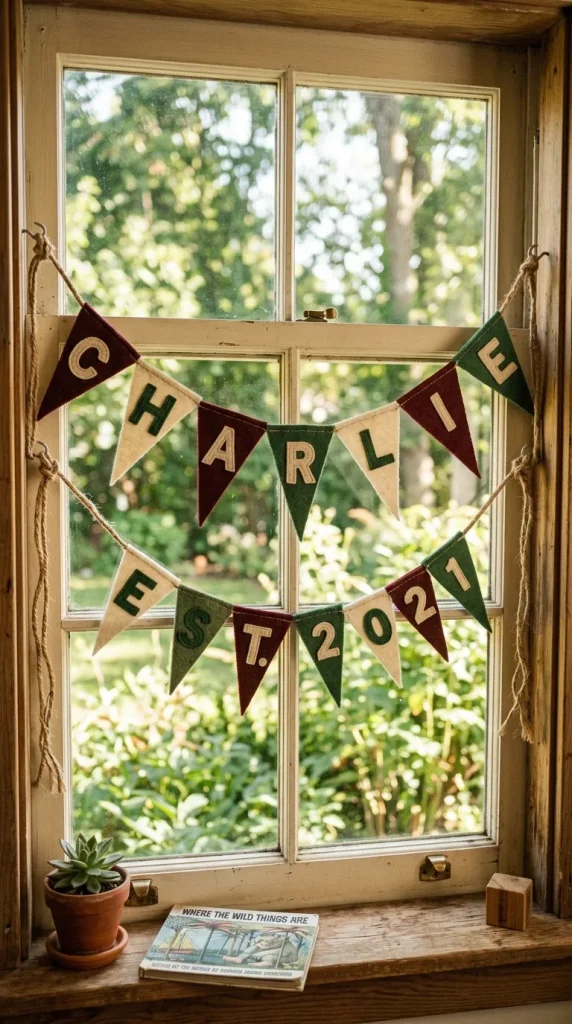
Idea 10: Homemade Heirloom Pennant Banners
How to Make
Craft custom, vintage-style felt pennants featuring the child’s name, birth year, or nostalgic sports motifs to hang above a desk or along a window frame. Cut stiff wool felt sheets into long, slender triangles using sharp fabric shears, choosing muted colors like burgundy, forest green, cream, and mustard yellow. Cut out contrasting felt letters or numbers using a stenciled stencil pattern, then adhere them to the pennant base using permanent, non-toxic fabric glue. Sew a strip of matching twill tape along the wide edge of the triangle, leaving long tails on either end for easy tying and hanging. Attach the completed pennants to a length of thick jute twine, stringing them across the room to create a festive, old-fashioned schoolhouse or summer camp vibe. This easy project is incredibly affordable and allows parents to infuse personal meaning into the room’s handmade decor elements.